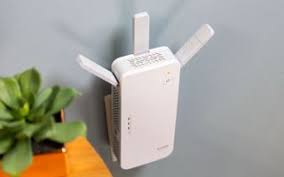
If you are unable to perform D’Link Dap 1610 setup, then this article can help you get the job done with ease. Here, we have jotted down two easy methods along with their instructions that will help configure your extender in matter of minutes. Let’s start over!
What are the 2 Methods for D’Link Dap 1610 Setup?
Two methods to set up the extender are:
-
Manual method
-
WPS method
We are now going to discuss both methods for the configuration of the device one by one.
Note: Don’t scroll away if you don’t have D’Link Dap 1610 extender. These two methods and the setup instructions provided in this article can be applied on all extender models.
Let’s dive in!
Manual Method: D’link Dap 1610 Setup
The manual instructions for extender setup process are as follows. Kindly follow them as the same way they are provided. Otherwise, you will be unable to set up the extender. Keep reading!
-
First things first, you need to power up the extender and wait till the LEDs on it start blinking.
The LEDs on the extender might take a longer time to blink. Have patience until then!
-
Connect your WiFi extender and your computer/ laptop using an Ethernet cable.
But, what if you don’t have an Ethernet cable? Well, in that case, we suggest to connect the devices wirelessly. And, how will you do that? Open your PC or laptop and click on the WiFi icon. Once the list of WiFi network opens up, locate your extender’s SSID. And, once the SSID is located, enter its password and click Connect. In this way, you can connect the devices wireless.
-
Now that your devices are connected, open a web browser and in its address bar, type dlinkap.local and press Enter. Prior to proceeding with the other step, you have to ensure that the web browser you have opened is up-to-date and also the browsing history and junk files – they must be all clear. Got it?
However, you also have to take care of typing errors. Thoroughly check the web address after entering it. On the off chance, there are typos in the web address, you will be redirected somewhere else instead of DLink WiFi extender setup page.
-
After carefully entering the web address, when you hit the Enter key on your keyboard, you will see that a login popup has appeared. Here, you simply need to input DLink extender login username and password into the provided fields and then click Login.
There you are – on the DLink WiFi extender setup page. What’s next? Follow the on-screen instructions and D’Link Dap 1610 extender setup process will be completed in a flash.
WPS Method: D’link Dap 1610 Setup
If using the manual method for extender configuration seems a daunting task for you, go with the WPS method right away.
The instructions to configure the WiFi range extender using the WPS method are as follows:
-
First of all, ensure that your WiFi range extender is placed within range of your host router.
-
Plug both of your devices in, ensuring that they are receiving steady power from their respective and working wall outlet.
-
Press the WPS button on your WiFi extender. Wait for 2-3 minutes.
-
Now, press the router’s WPS button too and wait for 1-2 minutes.
Until you are done with the fourth step, the DLink WiFi extender setup process will be completed already using the WPS method. See how simple it is to configure the extender, isn’t it?
Unplug your WiFi range extender and place it anywhere in your home. But, do not place it away from your router. If possible, you can relocate the router as well. And, once you are done with the placement process, connect all the devices in your home to the new extended WiFi network.
The Last Words
DLink WiFi extender is an outstanding networking device that you can consider if you really want to have access over the internet even in those areas of your home where you haven’t seen WiFi before.
Now, our article comes to an end here. We hope that the instructions we have provided in this piece of writing will help you perform DLink WiFi extender setup process like a pro.